
"vintage" flair - how I do it
As promised, here is lesson no. 2 for the week!
Ok, I admit - I'm not going to tell you EXACTLY how I do it. I have to keep a little mystery around my photography aesthetic - it'll keep you coming back. But this is first and foremost a place to learn more about photography - that's why I started this blog. So if you ask it, I will answer.
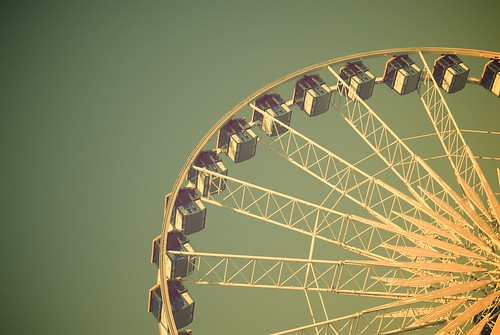
Mary was wondering how I achieved that vintage feel to these photo:
Let me state for the record that any "vintage" editing tricks I will espouse today I learned the old fashioned way - by trial and error. For any of you well versed in Photoshop there is an entire world out there of actions and tricks and edits to create shots that are as vintage as you would like.
These tips are for those of you looking for some creativity using very basic editing skills, so here goes:
1) Play around with the white balance, color temperature, and saturation. Click here to review my lesson on color temperature and saturation. Here is an example: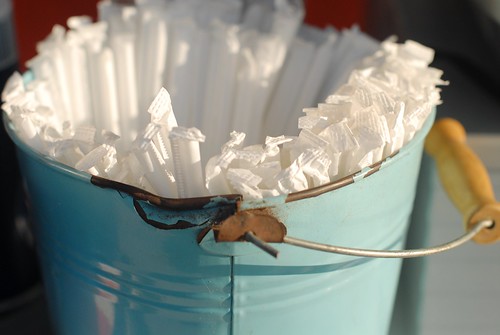
Here is the original photo - a pail full of straws at the county fair. I love the bright white against the aqua of the pail. 
Here is the "vintage" version, editing only the color temperature and saturation. Essentially, I bumped the color temperature WAY up and then dialed the saturation WAY down until I found that balance between the yellow-ness and the faded look of old photos.
This is the most basic way - here are a couple more options:
2) play with tint. iPhoto allows you to change the tint of an image, with a lever that moves from red to green. In Aperture there is a more advanced means of changing tint, allowing you to tint the photo to any color of the rainbow. I used this control in Aperture to change the tint of the ferris wheel photo above to have a more yellow tint.
3) check out this tutorial on how to make your digital photos look like lomo photography (click here for more info on lomography).
A few weeks ago I picked up a vintage 1960s film camera that I'm hoping to take for a spin soon. I'll be sure to post my "real" vintage images when I get a chance...


4 comments:
Hey Melissa,
It was great to meet you today! I wanted to send you this link before I forget. Here's the site that has photoblog templates for blogger. I think they're really great and I had zero problems by just following directions. Check it out.
http://www.ourblogtemplates.com/search/label/Photoblog
If you want to preview it on an actual blog, feel free to check mine out. I only changed it recently so the first couple of posts are really the only ones with bigger photos, but I think it makes a HUGE difference.
I was inspired by today's lesson; I had to try it out. I think they came out pretty good.
They are posted here if you want to see - http://no15creative.blogspot.com/2009/08/photo-friday-happy-weekend.html.
P.S. I gave you a shout out too! :)
Ok ...add a go at Vintage. Not sure if I really got it right but its not too bad. http://www.flickr.com/photos/33970180@N07/3843914061/
Amy and Angela - I'm so glad you guys tried out the lesson. I like the vintage look - gives the photos a different feel.
I just love experimenting post-production!
Post a Comment