
photography 201 - angles and light
The time has come readers, for me to confront one source of my own personal anxiety - how to use artificial light in my photos. By artificial I'm referring to flash photography, studio lighting, etc. I have read many a photography blog that talks about only using natural light sources because the photographer "hates flash." I am not a fan of flash, but I admit - my dislike stems in part from my complete lack of knowledge on how to really use my flash.
The premier blog to discuss lighting and photography is Strobist. I am personally following the Lighting 102 series for some in-depth lessons on lighting. So for the foreseeable future, Photo 201 will be summaries of what I learned over at Strobist.
Let's get started - let's talk about light. The vast majority of the lessons posted here at Lens Flare focus on what your camera sees, but it is just as important to determine what your light "sees" in your photograph. Huh? Let me explain - look at this photo below, courtesy of Strobist: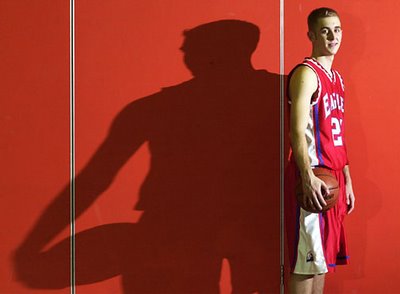 To see how light from a particular angle will affect your subject, view the subject from the position of the light. How can you do that? Simply by looking at the photo above, what can you determine about the light source?
He writes:
"1. Well, right off of the bat we know that the light is coming from camera right, because the shadow goes to camera left . . .
2. We know the light is hard because the shadow edge is hard. (We're not there yet, but you know that info all the same.)
3. We know the light is slightly higher than the subject because the shadow goes slightly down.
4. We know the light is fairly close to side light (i.e., close to the wall) because of the length of the shadow."
The point of this exercise is to train your brain to know how your subject will look under various lighting conditions. So let's try another one: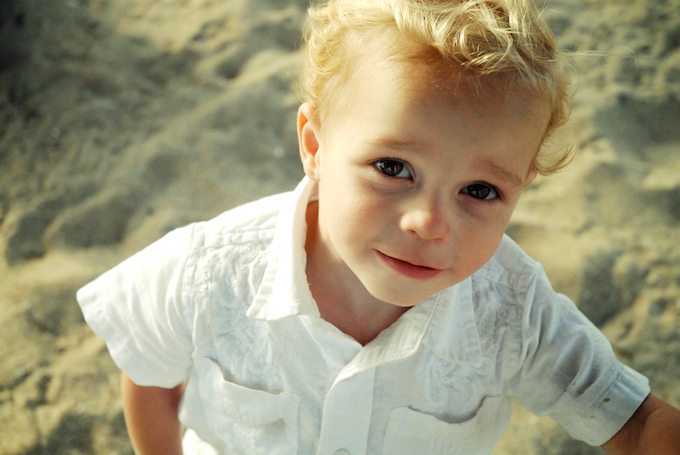
Here's my buddy Luke again, but this time let's look at where the light is coming from. For reference, it was about 6pm and we were under the pier looking for shells and playing hide and seek.
You can see the light is soft (no hard shadows) and that it is coming from camera left, and above (look at the position of the light on his face, and the shadows across most of his face and his shirt).
For those of you snoozing by now, here is why this is important - if you want improve or vary the lighting in your photos, you need to know how the light "sees" your subject. Still confused? Take Luke's photo - let's say I wanted a photo without any shadows on his face and shirt. What's a photographer to do? Well, by studying his photo above, we know that the late day sunlight is soft and pretty, but is only illuminating part of his face. With that knowledge, I could introduce an additional light source to help even out the shadows. For example, I could use a off-camera flash at an angle that would illuminate the other side of his face. Or perhaps I could use a reflector to capture the sunlight and bounce it back up towards his face.
Intrigued, readers? I hope so. I know this stuff is kind of dense - trust me, I had to have an additional cup of coffee to read Strobist last night and this morning - but I think we're on the verge of some serious progress when it comes to flash photography.
Try this exercise with photos you've already taken, and try to think about it next time you're shooting photos. Let me know if you have any questions, and if you'd like to follow along with Lighting 102, check out Strobist.


0 comments:
Post a Comment